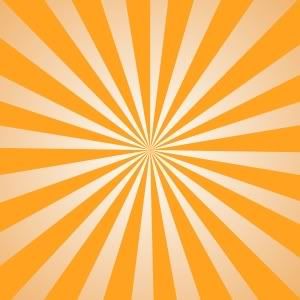
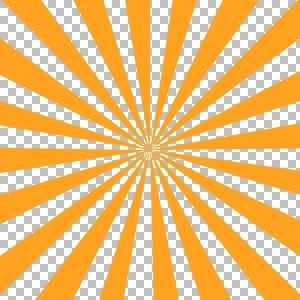
Here’s a neat little tip for you designers out there who don’t have Photoshop. Have you ever wanted to make one of those images with a bunch of different colored stripes emanating from a center point? It’s kind of like something in the realm of perspective. As the lines move from the center they grow in size. Here’s an example of what I mean.
Well, I used to be able to do this years ago in Photoshop, but since I primarily use Paint.net…..which I should note, I just got a copy of PhotoShop CS4 Elements but haven’t installed it yet…I’ve been trying to tackle it there. Sometimes, though, even the craftiest of designers need a little help once in a while in the form of plugins. Developers out there, who work with Paint.net create these plugins to do things that the normal version of Paint.net can’t do. One of them is a rectangular to polar conversion. You can read more about it and even download the plugin here.
Simply follow the instructions on how to install it and you are on your way. Now, let’s recreate that image above. You can choose any combination of colors you want.
First off, create a new image. I would keep it as square as possible for starters. I’ll use my normal 2000 x 2000 pixels with 200 ppi resolution. Of course, I’ll shrink it for display, here.
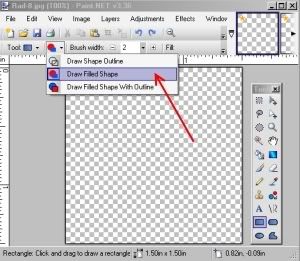
Now, looking at your blank screen, grab one color and switch to your Rectangle tool. Make sure you change the setting to Draw Filled Shape. This will create solid boxes instead of outlines.
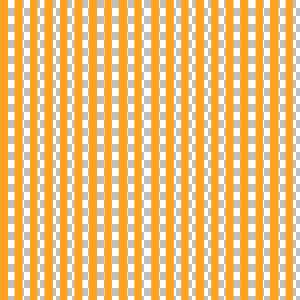
Start making stripes running from top to bottom. The more stripes you add the more you’ll get in the end. If you want to cheat a little bit make about five stripes. Then use the rectangle select to draw a box around those stripes. Copy the selection and then paste it back into the image. Drag it to the end of the last stripe and instead of creating one stripe at a time, you now have five. This will make filling up the canvas easier and with less chances of screwing up the widths. It helps if you space them apart, equally. As you get better you can play with spacing to create different effects. For now, make them all the same distance from each other. Like so.
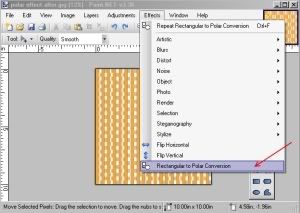
Now, you can do this next step now, or later depending on your own preference. I choose to do it now because….this is my tutorial. Anyway, if you have loaded the plugin, you should be able to find it under Effects>Rectangle to Polar Conversion.
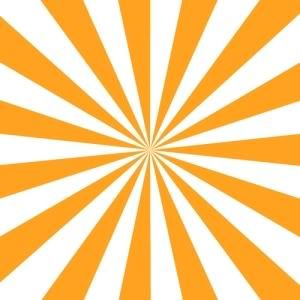
The effect automatically converts the top of the image into a single fixed point in the center of the image. If done correctly you should now see the image below. If you don’t, hit Ctrl-Z and see what happened. You might not have extended the stripes to the end of the canvas. Here's what it should look like.
That’s all there is to it. Go and play around with it and see how you can create effects that you can use in other images.
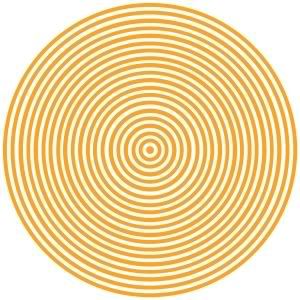
Q: What happens if I create horizontal stripes?A: Since the effect essentially takes the top of the canvas and bends it into a circle, if you used horizontal stripes you would get circles. A nice effect if you want to do bull’s-eyes or other weird things.
Q: Why do you like layers?
A: Working in layers allows me to create other effects or make changes without having to do a lot of backtracking. For instance, say you don’t like your color choices. If you did everything on one layer, you have to either undo or hope that you can work on top of what you’ve already done. With layers you can change one color or both without affecting the other. Here’s another cool effect if you use layers. Go to your lower layer and choose the gradient tool. Click and drag the mouse from the center to create a gradient. Pretty slick, huh?
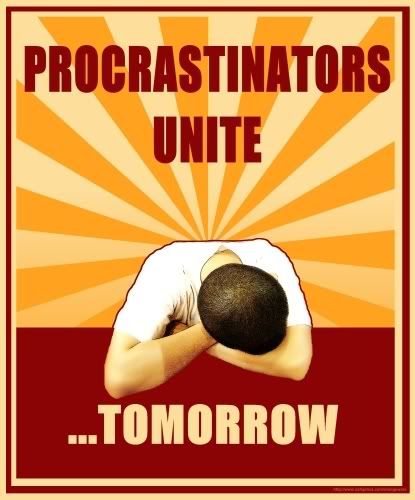
Here is an example of how I used all these steps in a design.
Each one of these elements, the sleeper, the text, the burgundy bar at the bottom, the boxes around the outside, and the stripes were all created on separate levels. That gave me the ability to mix and match, tweak and change a lot of stuff on the fly to get more flow from the design. I used the polar effect and gradient tool to create the stripes, just like I showed you. Go! Create! Have a good weekend!
Now, let’s tackle the secondary color. For the example, I'll use white. You can do this in two ways. The first is to choose the paint can and just fill in the gaps between stripes with your second color. The second method, which I like better is to create a new layer below this one and just fill in the entire image with the paint can. Since the layer on top has the stripes it will cover the areas on the layer beneath. Personally, I like the second method because it leaves no chance for bleeding into the other color and depending on the difference in colors it may bleed more leaving you with uneven or jagged edges. It also allows you to do other effects.


Paint.net is (at least in our opinion) the simplest option on the list. It still comes with a ton of powerful features like layers, adjustments, and user-created plugins, but is simple enough that complete newcomers can grasp it immediately. The features are across the top, and filters are accessible from a drop-down menu.
Some of the special effects are pretty cool: sharpen, blur, distort, emboss, etc. You can even get some Instagram-esque vintage effects in there for good measure. We don’t want to waste too much time on this one. It’s got a lot of features, an easy interface, and a simple layout. If you’re struggling with others on this list, then stick with the easiest option.
Posted on February 1, 2019 at 5:28 AM
Post a Comment